Friday, March 11, 2016

Moto Music

Motorcycle Friday

Today with the threat of rain bordering on "Epic Proportions" we decided to work on the Moto Guzzi.

So, I ran over to Jimmie's house around 10:00 and we got to work.

After a small issue with the ignition timing triggers involving crossed wiring the bike was running.
Albeit not well.
We checked the compression and found a significant disparity between the left and right cylinders.
The left was acceptable at around 150 PSI but the right was over 230 PSI.
With the throttle wide open the gap closed somewhat but was still something like 210 to 240.
That problem still needs further investigation.

The right cylinder was running extremely rich at low RPM and the bike would shut down at about 4000 RPM.
The right carb was removed and all parts inspected.
The Delorto carburetor is very similar in function to the Amal, we looked at and tested every orifice, we were so intrusive that we could have worked for the TSA.
Then we had one of those Ah Ha! moments.
The main and idle jets had been reversed by a previous carburetor diddler.
These are shown as part numbers 16 and 17 in the diagram.
Now it's my opinion that the designer allowed this problem to happen.
If the idle jet and main jet had different threads there would be no chance for this confusion.
Murphy needs to be kept in check by careful engineering not careful inspection afterwards.
Just my opinion...


We put them back in their rightful homes and Voila!
Check the link below for the result.


Now the bike runs and idles well, you can crank it up past 4K RPM without problem.

With that problem solved, we moved on to the brakes.

The front left disc and the rear disc are operated from the rear brake pedal in what is known as linked braking.
It seems that the circuit has a lot of air so the brake bleeding process began, then another Ah Ha! moment arose, the brake fluid was DOT 3 and it should be DOT 4.
A trip to the auto parts store was needed.

At this time the rain really arrived with strong winds and a torrential downpour.

Back to the brakes, after a short time of being seriously drenched, we decided to give up for the day happy with the success achieved.
The brakes will more than likely be a project for next Tuesday.

Now we can really say,

Ciao Bella

Norm

Saturday, March 5, 2016

Panther Petrol Problems

I Know, I Had To Use The English Word!

Other wise the Alliteration wouldn't work.

When we were running the Panther there were two problems with the gas supply, as you may recall from earlier posts.

1) The float level was too high.
2) The idle mixture was way too rich.

The Amal carburetor of the monobloc type has no means provided to adjust the float level.
I guess that they thought that their machining prowess was such that it would be just right every time.
My brother Jimmie has a theory that over time they suffered from tolerance drift when making the needles and seats.

The only way to adjust the level with any precision is to machine the face on the threaded connection which acts as gas hose connector and valve seat.


This is the part from my Panther, as you can see it too shows the marks of the Philistines.
However, the machined brass face is the one used to adjust the float level.
At first I thought that a really good finish was necessary to achieve a seal which would be gas tight.
But, upon reflection decided that gas should never get that high so it is a moot point.
I machined 0.020" from the face and refitted the part in the carb. With everything connected there were no leaks, that is a good thing.

On to the rich mixture at idle.
I purchased a new jet from Triumph Classic Motorcycles in Costa Mesa.


Now, I can remember part numbers and serial numbers and all kinds of stuff, but John is even more AMAL that I am. When I asked him about the jet I needed, he rattled off the part number immediately, I guess a life time of dealing with the stuff will do that do you.


This is the idle jet looking like it just came from the factory, which is hardly surprising as it just did.


This is the old jet, as you can see it has a really big hole.
Maybe the previous owner drilled it out to make it start better, who knows.


The new jet has been installed and is awaiting testing.

Now I am just waiting for the clutch parts from the UK  and we should be ready for another test ride.

The design for winch mount for the truck is proceeding apace and most of the material has been sourced from a local steel stockholder previously used for other bits.

Pencil and paper, but it still works, the good thing about pencils, is that you can see what you have.
There are no batteries to die on you and unlike pens, no ink to run out on you at the critical time.

I'll keep you up to date as things progress.


But here's a pop quiz:
What is the origin of the AMAL name.

Answer next time.

Or credit to the first correct answer.

Ciao Bella,

Tuesday, March 1, 2016

Buona Sera

A Short Trip To Italy!


Well more like a short trip to pick up an Italian motorcycle.
My brother Jimmie called to say that he had a line on a 1984 Moto Guzzi 650 SP.

Off we went to Sherman Oaks to take a look (we took the ramps just in case)

It turned out to be a straight bike with no big problems, plus the guy who owned it was a neat person who could have been another of our brothers by another mother.

We set up the ramps and started up the hill with the bike. Just as the front wheel hit the bed of the truck, Jimmie lost his footing and went off the ramp! Fortunately, the seller who was helping push was a big SOB and held the bike up straight with one hand. Jimmie landed on his feet so all was well.

However, this incident has made us think of a policy for the future. If the bike under consideration will not start,we will take the winch to ensure that it may be pulled up the ramps with no danger of going over the side.

That could be a project for Sheddington Engineering to design a winch attachment for the truck.

Some pictures of the Italian bike are below.


Safely Down The Ramp


The Proud New Owner


The Moto Motor


More soon on how it works out.


The "exciting" news is of course that I'm working on a website.
In future you can use the website links or just use the BLOG link as you choose.

The website is
WWW.SHEDDINGTON.COM
Click on the link below or copy the line above into your browser.
Ciao Bella

Norm
Credits
This publication has been vetted by the in house editor of Sheddington Enterprises and given her seal of approval.

Thursday, February 25, 2016

Velocette Generator Speed Up

Machining At Sheddington

The generator (dynamo) on the Velocette was reconfigured to 12V before I bought it.

When I last rode the bike I noticed that it did not charge well at low RPM.
A bit of research at the University of Google suggested that the 12V generator needed high RPM before it would charge correctly.

The sheaves (pulleys) were measured and the following ratio was found.
Driver 3.125 Driven 3.000
Giving a step up ratio of 1.13:1.

I decided to aim for a step up ratio of 1.25:1
So the following sheaves were required.
Driver 3.125 Driven 2.500.

The tough part seemed to be finding a drive belt that would accommodate the difference in diameters.
A search of the usual places, Amazon, McMaster Carr etc, did no turn up any suitable candidates.

By chance, I was in the ACE hardware store nearby (Madam does not think that it was chance, as I go there every day)
They had drive belts of the correct cross section and suitable length. I bought the one that seemed to fit the dimensions calculated.

The next step was to make a new driven sheave.
However after some careful calculations, I thought that I could make the new sheave out of the old sheave.

This is what was determined to be the best option to reuse the existing sheave.


A mandrel was made out of a bolt to mount the workpiece and set it up in the lathe chuck.

It is shown here set up in the lathe with the outside diameter already machined to size.
Check the link below.

Machining The Sheave

Here you can see the finished article.


Do you think that Velocette used Mitsuboshi belts?


The installation of the new belt and modified sheave was completed and the results are to be found using the link below.

Up and running.

In this video, the speeds are a bit of a problem due to the reflectivity of the driven sheave.
It throws the measuring device out of whack.
I'll try that again after dulling the surface somehow.
Overall the goal has been accomplished.
More soon an an exciting (well not really) new development in the world of bikes and travel blogs.
As I told a finance guy that I know when he was expounding the excitement factor of tax protocols,
"Pretty girls and fast motorcycles are exciting, tax is just BLAH"

Ciao Bella
Norm

Tuesday, February 23, 2016

Tuesday Challenges

BMW Modifications

My brother Jimmie has been taking issue with the BMW he recently acquired because of a little annoying safety feature.
If you put the side stand down it shuts off the engine.
So when you roll the scoot out of the garage and need to park it whilst you go back and close the garage door (I know old school, who does that any more, press a button to close the garage door)

So we checked the circuit diagram and found the color of the wires we needed to locate.
After removing 17 screws, I kid you not, we were able to remove the left side fairing and access the side stand switch.


After a brief consultation, we decided to add a jumper in the circuit ahead of the switch but leave the switch in circuit.
The idea being that if the jumper falls off, the bike will still work as intended. Whereas if you cut out the original switch and your jumper falls off you are up shit creek in a barbed wire canoe.

The umbrella is an essential part of our equipment otherwise you risk sunburn on the back of the neck.

The day ended well with the fairing installed and the engine running with the side stand down.
Our only problem was that a nut plate fell off and disappeared somewhere inside the fairing.
Off we went on a trip to the hardware store, where we purchased the necessary bits.
We managed to install a big fender washer and a standard nut on the inside of the fairing, 
We just need to remember that piece of information the next time we take it apart.


I can't figure out why, but the arthritis in my hands has been really bad for the last couple of days, the weather has been really warm and dry so there must be some other reason.
Lack of beer maybe, no probably not, too much beer, no such thing, so maybe it is just old age...


So I got out the hand machine that Barb and Leon gave me.
Looks like I need to go back to using it every day instead of once per week.
Man does this thing do a number on you, but it really works very well.

Thanks again to Barb and Leon for the machine.

Next week we plan to ride a couple of the old bikes down the coast, watch for an update.

Ciao Bella.
Norm

Friday, February 19, 2016

Quick Update

Panther Clutch Update

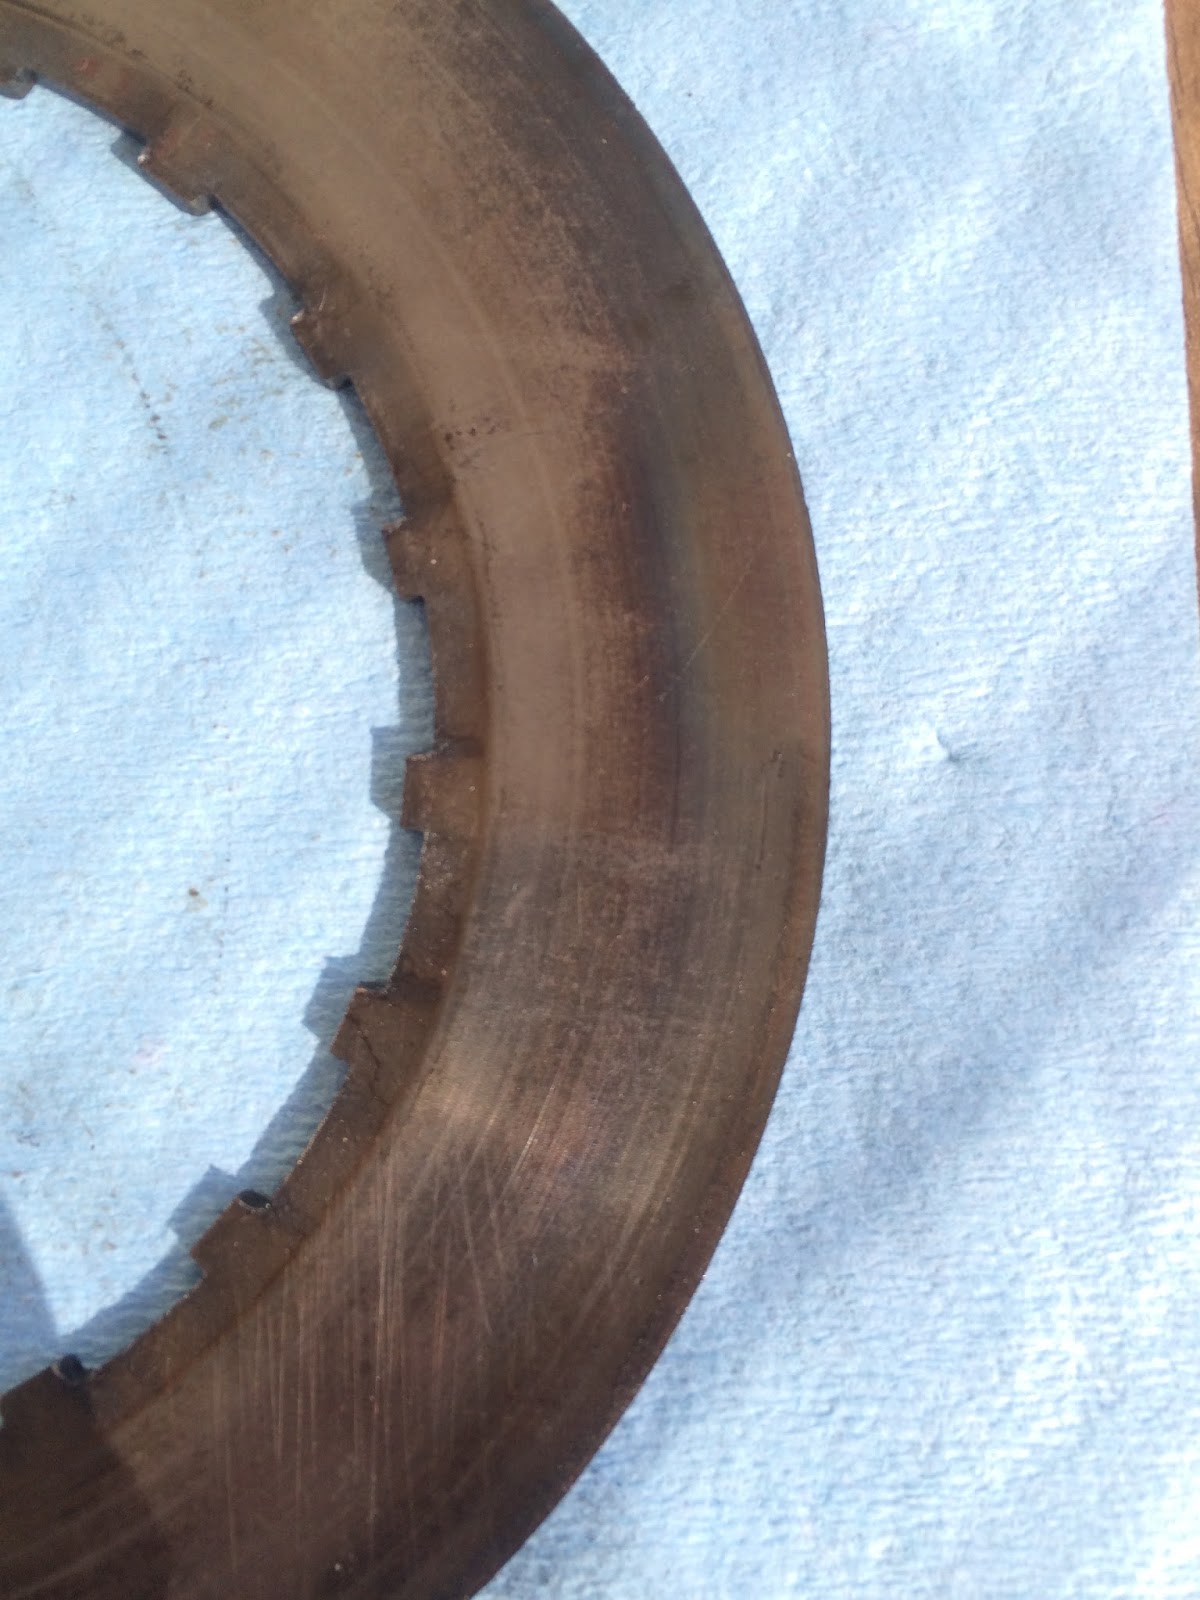
Once the clutch was apart and cleaned, I looked at the plates.
They do not seem to be bowed but they have obviously been hot.
If you look at the color spectrum on the edge of the plate it shows that it has been around 
500 degrees F at some time. Could have been that the clutch was rotating with little or no lubrication and heated the outer edge.

The springs were a mismatched set with three of one size and two of another, that makes it hardly surprising that the nuts were not set in the same place.

I have a new set of five springs winging their way from the UK, no the POC has not had a change of heart. I got them from Draganfly.

Fortunately lots of those older bikes used the Burman gearbox and clutch arrangement.

More soon as it progresses.

Ciao Bella
Norm

Thursday, February 18, 2016

Panther Progress

It May Be Reverse Progress!

 Last weekend the first test ride did not go as planned.
The clutch would not release completely which made coming to a complete stop a bit tricky.
"No officer you can't give me a ticket for a California stop, it's the clutch honest"

The clutch cover has been removed and the clutch inspected.

The first thing of note is that the clutch spring nuts are all over the place, they should all be just flush with the end of the stud.
The first thing I needed to do was make a tool to remove the nuts.
As the measurement  was a bit tricky with everything in place, I made a best guess.

The first piece was good enough to remove the nut which had least tension.


Once I had the first nut I could make decent measurements and remade the wrench.


As you can see the Panther was previously owned by Mr. Phil I. Stine
When I was an apprentice millwright, the manager of the engineering department Mr. Dodds, called vise grip or pipe wrench damage the marks of the Philistines.
Translation to UK English:
Vise Grip = Mole Grip
Pipe Wrench = Stillsons 
These were made by guys who were either too lazy or too uneducated to use the correct tool.
OK once in a while you have no choice, but you need to do your best to avoid them.

But even worse, beat the crap out of everything in sight with a hammer and punch or chisel.
Grrrrr.

Once the nuts and springs were all removed with the Mk II tool the cover and clutch plates were removed.

Now I have a conundrum, The assembly has the correct number of friction plates, which is three as per the addendum note on the Burman drawing of the clutch and gearbox.
The problem is that instead of one plate in the back of the set up there are two.
Both plates in question are seriously scored, now this cannot be from friction / slip between each other as they are both internally splined with no chance for relative rotation.


More research is obviously required.

I'll update the blog when I find out something, or maybe just give up and become a Philistine.

NAH, never going to happen.

Ciao Bella
Norm